
Remote Desktop Connection using C#
Remote Desktop C#
Today we will focus on how to make Remote Desktop Connection with C#. You will soon see how easy it is with the framework 4.0. We just need to add a reference, add a remote master object into the Toolbox, and write a few lines of code.
Build Remote Desktop using C#
By creating a new project, go to the COM components section by calling Add Reference from the References section. Microsoft Terminal Services Active Client 1.0 Type Library reference to find and add to our project. After this process, we call the Toolbox field by right-clicking the Chooses Items. In this section, we go to COM components and find the Microsoft Terminal Services Client control version-1 object and add our object to the Toolbox by saying OK.
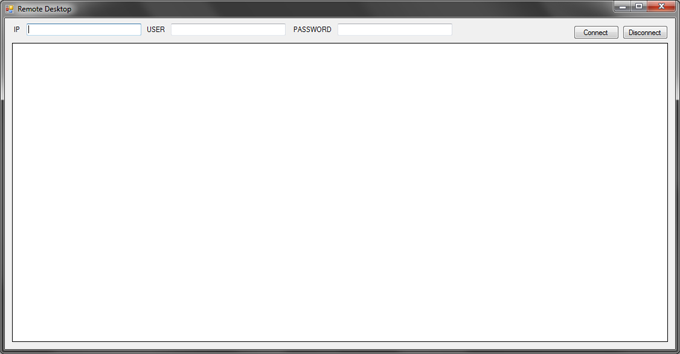
Now it’s time to add three textbox, two buttons and Microsoft Terminal Services Client control version-1 objects to our form.
txtIP : We will use this TextBox to enter an IP address.
txtUser : We will use this TextBox to enter the user name we will use when connecting.
txtPassword : We will use this TextBox to enter the password we will use when connecting.
btnConnect : This name implies the Connect button.
btnDisconnect : This name implies that the link on the cut off button.
axMsTscAxNotSafeForScripting1 : The object that we added to the Toolbox for this connection. I didn’t even change the name of that.
Remote Desktop Codes using C#
BtnConnect Codes;
1 2 3 4 5 6 7 | private void btnConnect_Click(object sender, EventArgs e) { axMsTscAxNotSafeForScripting1.Server = txtIP.Text; axMsTscAxNotSafeForScripting1.UserName = txtUser.Text; IMsTscNonScriptable secured = (IMsTscNonScriptable)axMsTscAxNotSafeForScripting1.GetOcx(); secured.ClearTextPassword = txtPassword.Text; axMsTscAxNotSafeForScripting1.Connect(); } |
BtnDisconnect Codes;
1 2 3 | private void btnDisconnect_Click(object sender, EventArgs e) { axMsTscAxNotSafeForScripting1.Disconnect(); } |
Yeah, that’s all, Note that the event here is axMsTscAxNotSafeForScripting1 do not leave this object small when you add it to your form. If possible, cover the form. So you can see the screen of the computer you’re connected to.
Discover practical approaches to appliance care and maintenance by clicking here. welsh corgi kennel